TM SIM Registration Online 2025: Step-by-Step Guide (Link)

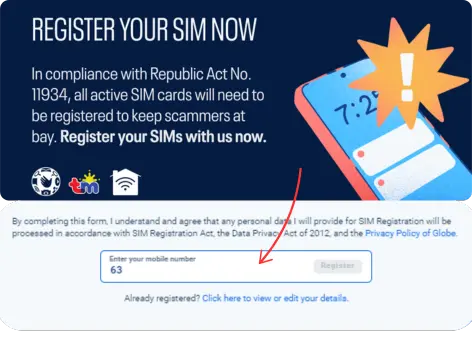
Registering your TM SIM card is essential for uninterrupted service, safeguarding personal information, and accessing exclusive promos. Thanks to the SIM Card Registration Act, it’s now mandatory for both new and existing users in the Philippines to register their SIMs. Fortunately, the process is quick and hassle-free, allowing you to complete it online through the official web portal or the GlobeOne app.
By registering your SIM, you not only comply with regulations but also unlock various perks offered by your network provider. This guide walks you through the simple steps needed to register your TM SIM online in 2025, ensuring a seamless and secure connection to your friends, family, and the digital world.
Step-by-Step Guide on How to Register TM Sim
Table of Contents
- 1 Step-by-Step Guide on How to Register TM Sim
- 2 Acceptable IDs and Personal Information
- 3 How to register a TM SIM Card Online?
- 4 TM SIM Registration via Online Link
- 5 TM SIM Registration via Globe One App
- 6 Steps to Activate Your TM SIM Card
- 7 Pro Tips for Successful Registration
- 8 Errors and Troubleshooting During Registration
- 9 How To Change or Update TM Sim Details?
- 10 Freebies after TM SIM Registration
- 11 Exciting Promos for New TM SIM Card Users
- 12 Final Words
- 13 Frequently Asked Questions (FAQs)
SIM card registration is essential for ensuring security and enabling access to a range of services and promotions offered by your mobile network provider.
Gather the Necessary Information
Before starting your TM SIM online registration, ensure you have all the required information ready. Here’s a quick checklist:
- TM SIM Card:
- Have your SIM card ready as specific details will be required during registration.
- Active TM Mobile Number:
- Ensure the mobile number associated with your SIM card is active for successful registration.
- Valid ID:
- Government-issued ID or any other valid identification document for verification purposes.
Locate SIM Card Details
To streamline the registration process, ensure you have the following details ready:
- SIM Card Number (ICCID):
- A unique 19-digit serial number is located on the back of your SIM card.
- PUK Code:
- An 8-digit Personal Unlocking Key found on the back of your SIM card, is required for security purposes.
Acceptable IDs and Personal Information
Government Valid Id’s
- Philippine Identification Card (PhilID/National ID)
- Passport
- Driver’s License
- SSS ID (Social Security System)
- GSIS ID (Government Service Insurance System)
- Voter’s ID
- PRC ID (Professional Regulation Commission)
- NBI Clearance
- Police Clearance
- IBP ID (Integrated Bar of the Philippines)
- OWWA ID (Overseas Workers Welfare Administration)
- BIR ID (Bureau of Internal Revenue)
- PhilHealth ID
- Senior Citizen ID
- UMID Card (Unified Multi-Purpose ID)
- PWD ID (Person with Disabilities Card)
- Postal ID
- Certificate of Barangay Clearance
- School ID (students)
- Company ID (employees)
- Other valid government-issued IDs
Personal Information
- Full Name
- Birthday
- Gender
- Address
- Postal Code
- Mobile Number
- Government ID Card
- ID number
- Government ID with picture
- Selfie
- Proof that all info is correct.
- SEC Certificate of Registration
- Board Resolution representative
- a Special Power of Attorney.
- other juridical entities,
Requirements for Companies Registering a TM SIM
If you’re registering a TM SIM under a company name or an authorized representative, make sure you have the following documents:
- Official Name of the Representative: The name of the person authorized to register the SIM.
- List of Mobile Numbers: A list of the mobile numbers to be registered.
- Registered Company Name: The official name of the company.
- Full Address of the Company: The complete physical address of the business.
- Proof of Business Registration: This includes documentation such as:
- Partnership, Corporation, Cooperative, Foundation, or Association registration
- Bureau of Internal Revenue (BIR) certificate
- Government Agency registration
- Local Government Unit (LGU) certification
- State Universities and Colleges (SUCs) registration
- Foreign Missions or Foreign Entities in the Philippines
Additionally, you will need:
- Government ID: A valid government-issued ID with a photo and ID number.
- Registration Certificate: Such as a DTI Registration.
- Proof of Authority: A resolution or official document designating the representative responsible for registration.
Tourists
If you’re a foreign national registering a SIM card, ensure you have the following documents:
- Passport Bio Page and Visa Page:
- A copy of your passport’s identification and visa pages.
- Proof of Address:
- Examples include a hotel reservation or a host’s affidavit.
- Return Ticket:
- A ticket confirming your return to your home country or onward travel.
Important: Foreign-registered SIMs will be deactivated automatically after the 30-day validity period
Residents
- Passport Bio Page and Visa Page: A copy of the passport’s bio and visa pages.
- Proof of Address: A document confirming your current residential address.
- Alien Certificate of Registration Identification Card (ACRI-Card): A valid card issued to foreign nationals residing in the Philippines.
- Official ID from a Visa-Issuing Body: An ID issued by the agency that provided your visa.
- Work Permit: A permit from the Department of Labor and Employment (DOLE) if you’re employed.
- Student ID: For students, an ID from a recognized educational institution.
- Legal Travel/Admission Document for People of Concern (POCs): For individuals categorized as People of Concern, a legal document confirming their status.
How to register a TM SIM Card Online?
You can easily register your TM SIM card using one of the methods listed below:
- Via the TM SIM Registration Link Online
- Through the GlobeOne App (available for both Android and iPhone users)
Choose the method that works best for you to complete your SIM registration hassle-free!
TM SIM Registration via Online Link
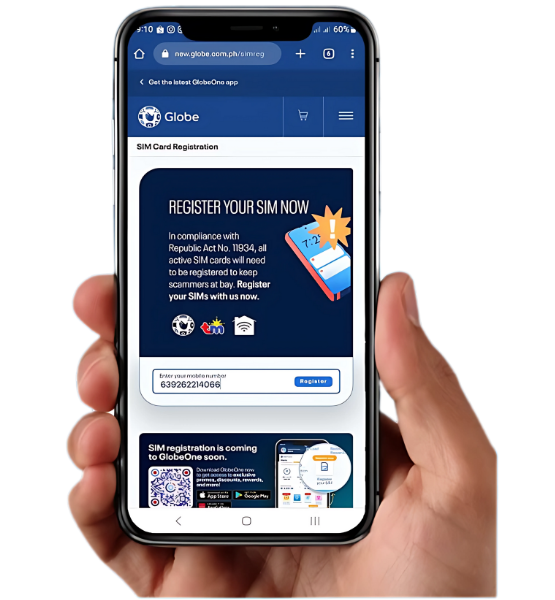
Now that you have gathered all the necessary information and documents, follow these simple steps to complete your SIM registration online via Link. Our visual tutorial will help guide you through each step:
Choose Your Preferred Language
Select either English or Taglish to proceed with the registration process in your preferred language.

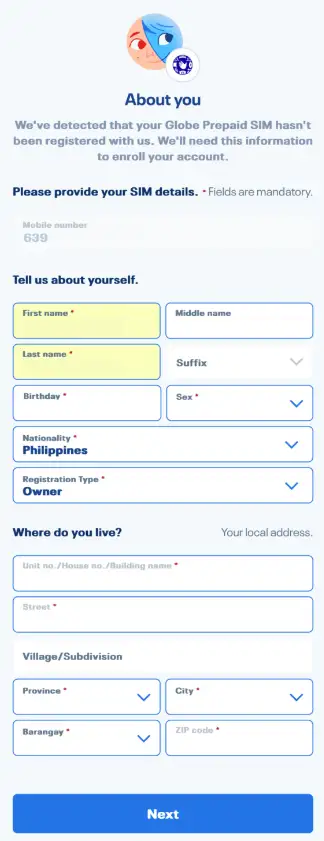
Fill in Each Section:
The sections below explain what information should be included in each section and how to submit it correctly.
Personal Information
Fill in details about yourself:
- Name
- ID
- Gender
- Address
- Nationality
- Registration Type
- Local Address
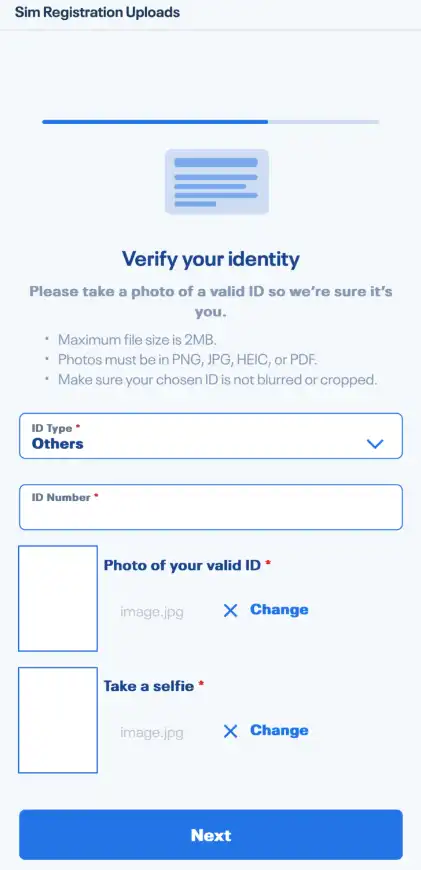
Identity Verification:
Fill in the ID Number and upload the required documents such as:
- Photo of your Valid ID.
- A clear selfie Photo
Make sure your photo and ID image are under 2MB. If you’re having trouble with the selfie size, just try compressing the image!
Final Step:
- Check the box to agree to Globe’s Privacy Notice
- Click the submit button
Congratulations, your Sim Registration is complete! You will now see your reference number.
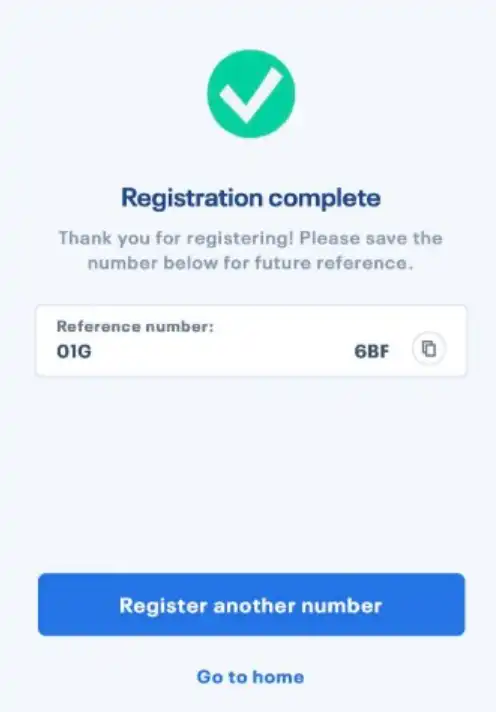
Confirmation
- Confirmation Message: Once your registration is verified, you will receive a confirmation message on your mobile number.
- Completion: This confirms that your SIM card registration has been successfully completed.
Now that your SIM card has been officially registered, you can enjoy a seamless mobile experience, exclusive promotions, and enhanced customer support.
TM SIM Registration via Globe One App

Register your SIM through the Globe One app by following the detailed instructions below to ensure accuracy.
Steps to Activate Your TM SIM Card
Download App


Steps on how to register:
Tap “Register Now” when you open the GlobeOne app.
Verification:
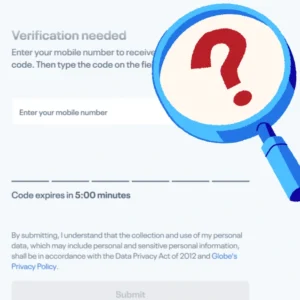
Globe must verify your identity to proceed.
- Select your registration network.
- Enter your Mobile Number to receive the code.
- Type code on required field.
Fill out form*
Globe ensures a personalized connection by getting to know you better.
- Verify your identity by choosing an appropriate ID type. (The acceptable IDs are mentioned below.)
- Enter the ID Number
- Upload or take a photo of your valid ID.
- Ensure Photo size is less than 2MB.
- Confirm the ID card is yours.
- Take a selfie
- Click Next
- Agree to the Terms and Conditions.

You’re done!
That’s it. 🙂
- Save your reference number securely; you may need it to check your registration status later.

Appropriate ID Type:
- Government-issued IDs:
- Passport
- Driver’s license
- National ID card (Philippine Identification System ID or PhilSys ID)
- Social Security System (SSS) ID
- Government Service Insurance System (GSIS) ID
- Professional Regulation Commission (PRC) ID
- Voter’s ID
- Other valid IDs:
- School ID (for students)
- Company ID (for employed individuals)
- Postal ID
- Senior Citizen ID
- Persons with Disabilities (PWD) ID
- Barangay Clearance/Certificate
Pro Tips for Successful Registration
- Clear ID Photo: Make sure your ID photo is clear and legible.
- Double-check Details: Review all entered information for accuracy before submitting.
- Visible Photo and Signature: Ensure your ID documents clearly display the holder’s photo and signature.
- Valid ID: Use only valid, unexpired identification documents.
- File Size Limit: Ensure the file size does not exceed 4MB.
- Secure Connection: Avoid using public Wi-Fi for security reasons.
- Need Assistance?: If you experience delays, reach out to TM’s support team for help.
Errors and Troubleshooting During Registration
While registering your Touch Mobile SIM online, you may encounter some common issues. Here are some troubleshooting steps to help you resolve them:

Invalid ID Error
- Ensure that the ID you entered is not expired.
- Verify that the ID you used is listed among the acceptable forms.
- If the issue persists, try using an alternative valid ID.
Timeout Error
- Make sure you have a stable internet connection. Switch to a more reliable network if needed.
- Try registering during off-peak hours when the server load is lower.
- Clear your browser’s cache or the app’s data and try again.
Photo Uploading Failure
- Ensure the photo is clear, visible, and meets the required quality standards.
- Check that the file size of your ID photo does not exceed the 5MB limit.
- Try using a different device or browser if the problem continues.
Verification Message Not Received
- Wait up to 15 minutes for the OTP, especially during peak times.
- Double-check the phone number you entered and ensure you have good network coverage.
- If problems persist, check TM SIM No Signal Error article for further help.
SIM Already Registered Status
- Contact TM customer support to verify your SIM’s registration status.
- For new SIMs, the previous owner might not have deregistered it properly.
App Crashes
- Make sure you’re using the latest version of the TM app.
- Restart your device and reopen the app.
- Clear the app’s cache through your device settings.
- If issues continue, consider using the web-based registration method.
By following these troubleshooting steps, you should be able to resolve most issues and complete your SIM registration without further complications.
Still Having Trouble?
If you’re still facing issues during the registration process, don’t worry! You can reach out to TM SIM customer support for further assistance. Simply contact the official registration hotline at (02) 7730-1500, and their team will help resolve your issue.
Alternatively, you can visit the nearest authorized retailer or TM store with a valid ID. The staff will assist you in completing the registration process in person, ensuring a smooth and hassle-free experience.
How To Change or Update TM Sim Details?
In some cases, you may need to update your SIM registration details due to changes in your personal information. Follow these steps to easily update your details:

When to Update Your Information
You should update your SIM registration details whenever there are significant changes in your personal information, such as:
- Change of name (e.g., due to marriage or legal reasons)
- Change of address
- Update or renew your ID
Keeping your details up-to-date ensures better security and improved customer support.
How to Update Your Details
To update your SIM registration information, follow these steps:
- Visit the Globe SIM Registration Portal
- Go to new.globe.com.ph/simreg.
- Click “View or Edit Your Details”
- Select the option under the “Enter your number” box.
- Enter Your 11-Digit Mobile Number
- Type in your active TM SIM number.
- Update Your Information
- Update details like your name, ID, address, or other personal info.
- Confirm and Submit Changes
- After editing, confirm the changes and click submit.
- Verify Changes with OTP
- Enter the One-Time Password (OTP) sent to your registered number.
- Complete the Update
- Once the OTP is verified, your SIM details will be updated.
Freebies after TM SIM Registration
TM 5G-Ready SIM: Speed Up Your Mobile Experience
TM has introduced the 5G-Ready SIM, providing users with faster mobile internet speeds where 5G signals are available. If you’re in a 5G-enabled area, you can take advantage of lightning-fast internet on your compatible 5G device. This is especially useful for those who enjoy TM roaming services while traveling, ensuring a seamless mobile experience anywhere you go.
Security and Protection
TM takes your security seriously. As part of the SIM Registration Act, TM ensures that your registration is protected by the Philippine Government’s efforts to safeguard users from spam, scams, fraud, and other illegal activities. Registering your SIM card helps maintain a secure environment for all users, providing peace of mind.
- 5 GB of EasySURF50 for Free
This generous data allocation includes:
- 2 GB of internet data
- 3 GB of FunALIW Pack (perfect for social media and entertainment apps like Facebook, YouTube, Mobile Legends, TikTok, and WeSing)
- Unlimited texts to all networks
- Validity: 3 days

How to Claim Your Freebies
To enjoy this awesome promo, simply text FREEEZ50 to 8080. You’ll receive a confirmation text, and the freebies will be activated on your account.
Make sure you register your SIM card online and start enjoying these amazing offers right away! Don’t miss out on the chance to maximize your mobile experience with TM.
Exciting Promos for New TM SIM Card Users
As a newly registered SIM card user, you’re in for some great rewards! TM offers exclusive promos and freebies that make your mobile experience even better. Once you’ve successfully registered your SIM card online, you can enjoy the following benefits:
REWUNLICALL
- Unlimited calls valid for 1 day
Required Reward Points: 2
SURF100MB
- 100MB of data valid for 1 day
Required Reward Points: 2
REWCOMBO2
- 20 minutes, 20 SMS valid for 1 day
Required Reward Points: 2
REWCOMBO4
- Unlimited calls and texts to TM, valid for 1 day
Required Reward Points: 4
REWCALL
- Unlimited calls to TM and 100MB data, valid for 1 day
Required Reward Points: 4
REWTXT
- Unlimited all-net texts and 100MB data, valid for 1 day
Required Reward Points: 4
SURF250MB
- 250MB of data, valid for 1 day
Required Reward Points: 4
REWCOMBO10
- Unlimited calls, unlimited all-net texts, and 100MB, valid for 1 day
Required Reward Points: 6
SURF500MB
- 500MB of data, valid for 1 day
Required Reward Points: 10
SURF1GB
- 1GB of data, valid for 1 day
Required Reward Points: 10
How to Redeem TM Promo Rewards
To enjoy these rewards, simply use your TM reward points to unlock the desired promo. The process is simple, and you can easily redeem your points through the TM app or by texting the designated keyword to the provided number.
Final Words
Registering your TM SIM card online is a vital step for a secure and hassle-free mobile experience. By following the steps in this guide, you can quickly complete your registration and take full advantage of the benefits that come with it.
Ensure that your registration details are always up-to-date and don’t hesitate to contact TM customer support for any assistance. Keeping your SIM card properly registered not only secures your account but also opens the door to exclusive services and promos, ensuring you’re always connected with loved ones.

